A collection of 28 songs from the last 60 years of New York arranged into a 55 minute mix.
Breakdown
This project is the culmination of hundreds of hours of work across a variety of programs and mediums both audio and visual. Initial concept art was the first element designed in May 2019 and established a visual identity for the project.
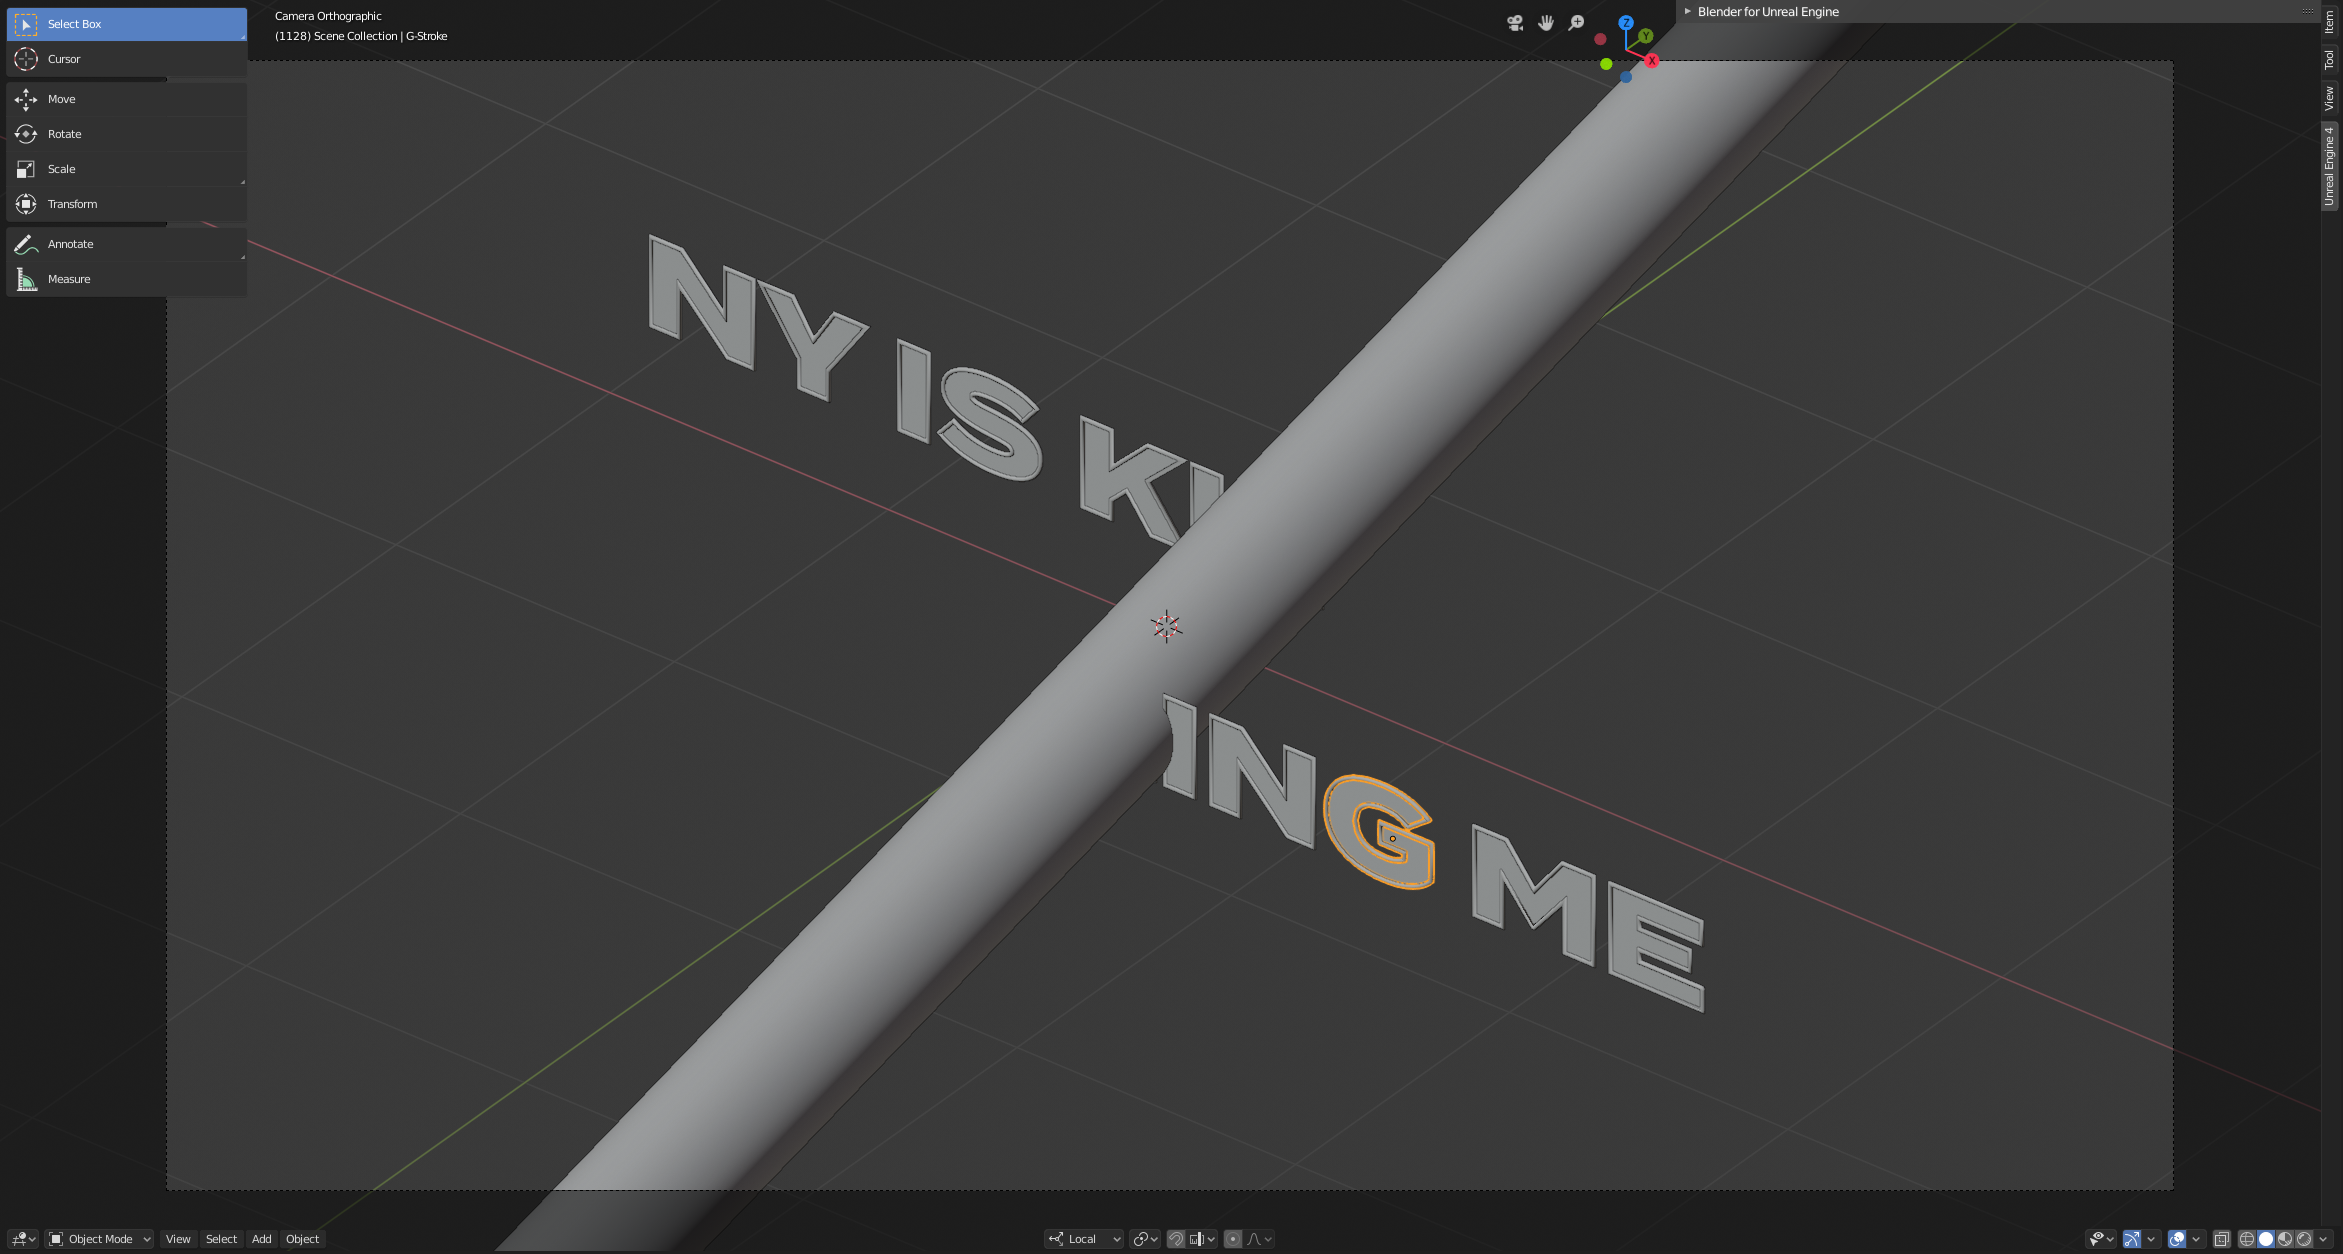
Over the next year, songs were curated and assembled in Ableton. In early 2020 the audio portion of mix was completed and work began on the visualizer. The idea was to construct the scene from the concept art in 3D and use slow, hypnotic camera motion and distortion synced to the music. The scene text and mask geometry was recreated in Blender.
Attempt 1: Apple Motion
The first attempt used Apple’s Motion software to assemble the different pieces. A one minute seamless loop of the camera orbit was exported as black text, white text, and mask layers. Once imported into Motion all the layers were looped and the masking was applied along with the background red glow. Ripple effects were applied to the mask layer with parameters driven by audio nodes tuned to low/medium/high frequency ranges.
This effect looked great but issues with Motion’s audio analysis for large audio files proved impossible to work with. As the length of the audio to be analyzed increased, the time it took to process would increase exponentially making it impossible to render the entire hour using Motion.
Attempt 2: After Effects
The second attempt used Adobe After Effects to mirror the setup from Motion. The same exported layer footage from Blender was fed into After Effects which can create key frames from audio in a fixed amount of time allowing me to analyze the entire hour without any issues. Problems started to arise, however, when creating the distortion effects. In order to match the Motion reference animation, at least three separate distortions were needed, two ripple effects with different centers providing an interference pattern and a bulge effect, not to mention the per RGB channel distortion on the white text.
The problem became trying to dial in the parameters for these expensive effects. Previewing the effect at the full 4K was necessary to tune the high frequency ripple parameters and evaluate the sync with the music track but rendering as little as 15 seconds could take upwards of 10 minutes. The turnaround time for testing effect settings was too long to converge on a final result.
Attempt 3: Unreal Engine 4
The third attempt exported only the geometry from Blender and used Unreal Engine 4’s Composure compositing workflow to render each layer to a texture and composite them together allowing me to write my own post processing shader material to distort the mask in real time.
This approach almost worked except for a bug within Composure. If you have a camera with an orthographic projection, Composure will ignore that and instead use whatever the last perspective projection settings were for the camera. An orthographic projection was a strict requirement of the design as the ambiguous perspective effect achieved with the camera orbit breaks down without it.
Attempt 4: Unreal Engine 4 (Take Two)
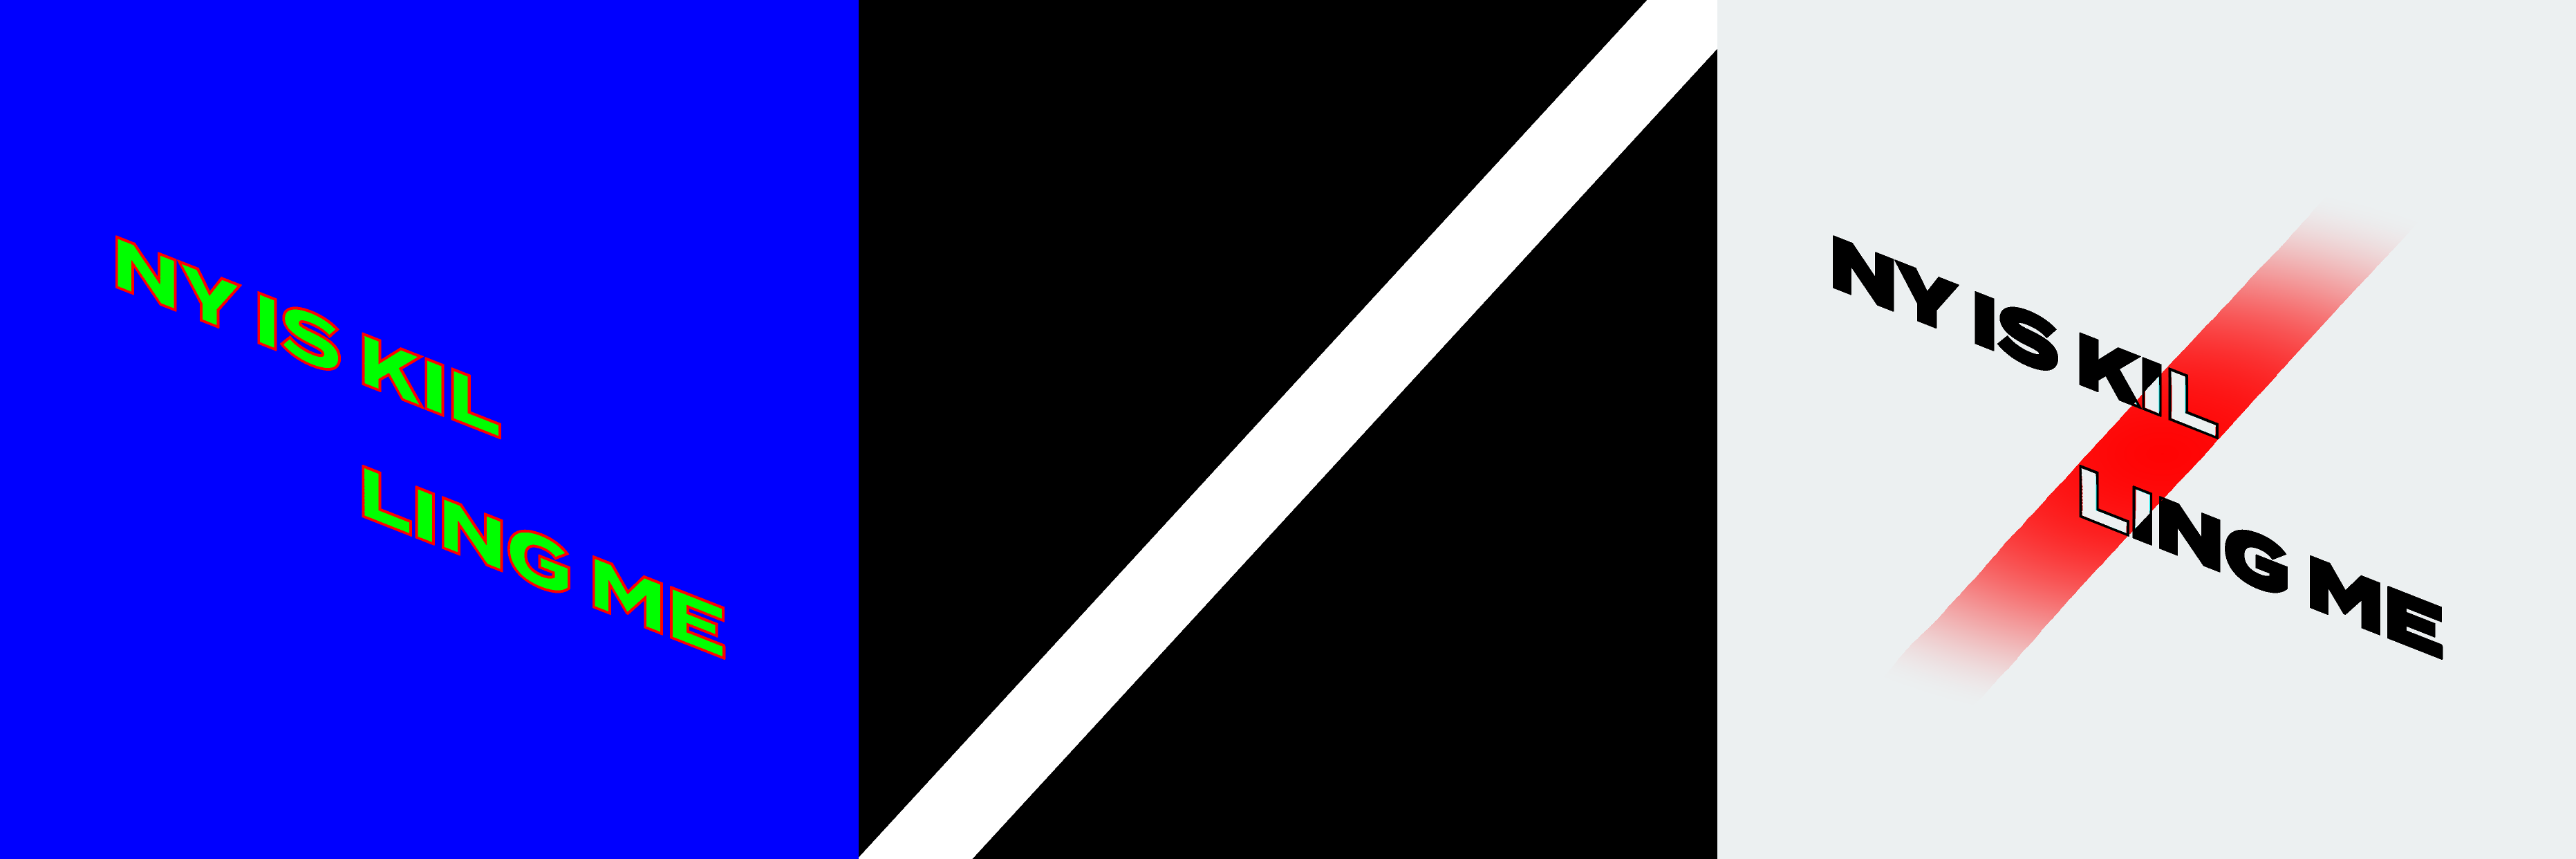
The fourth and final attempt ditched composure and used some tricks to achieve the desired final image completely inside the stock UE4 rendering pipeline. First the text is rendered using pure RGB values for each part of the scene. The background is rendered as 100% blue, the text stroke as 100% red, and text fill as 100% green. Next, the mask is rendered to the stencil buffer (custom depth?). Finally, using the composure post processing shader as a base, I can render the final image all at once.
Using the stencil buffer I can now tell what part of the image any given pixel is supposed to be and whether or not it is within the mask. For example, if a pixel is red and inside the mask, I can set it to white because I know it is a text fill pixel.
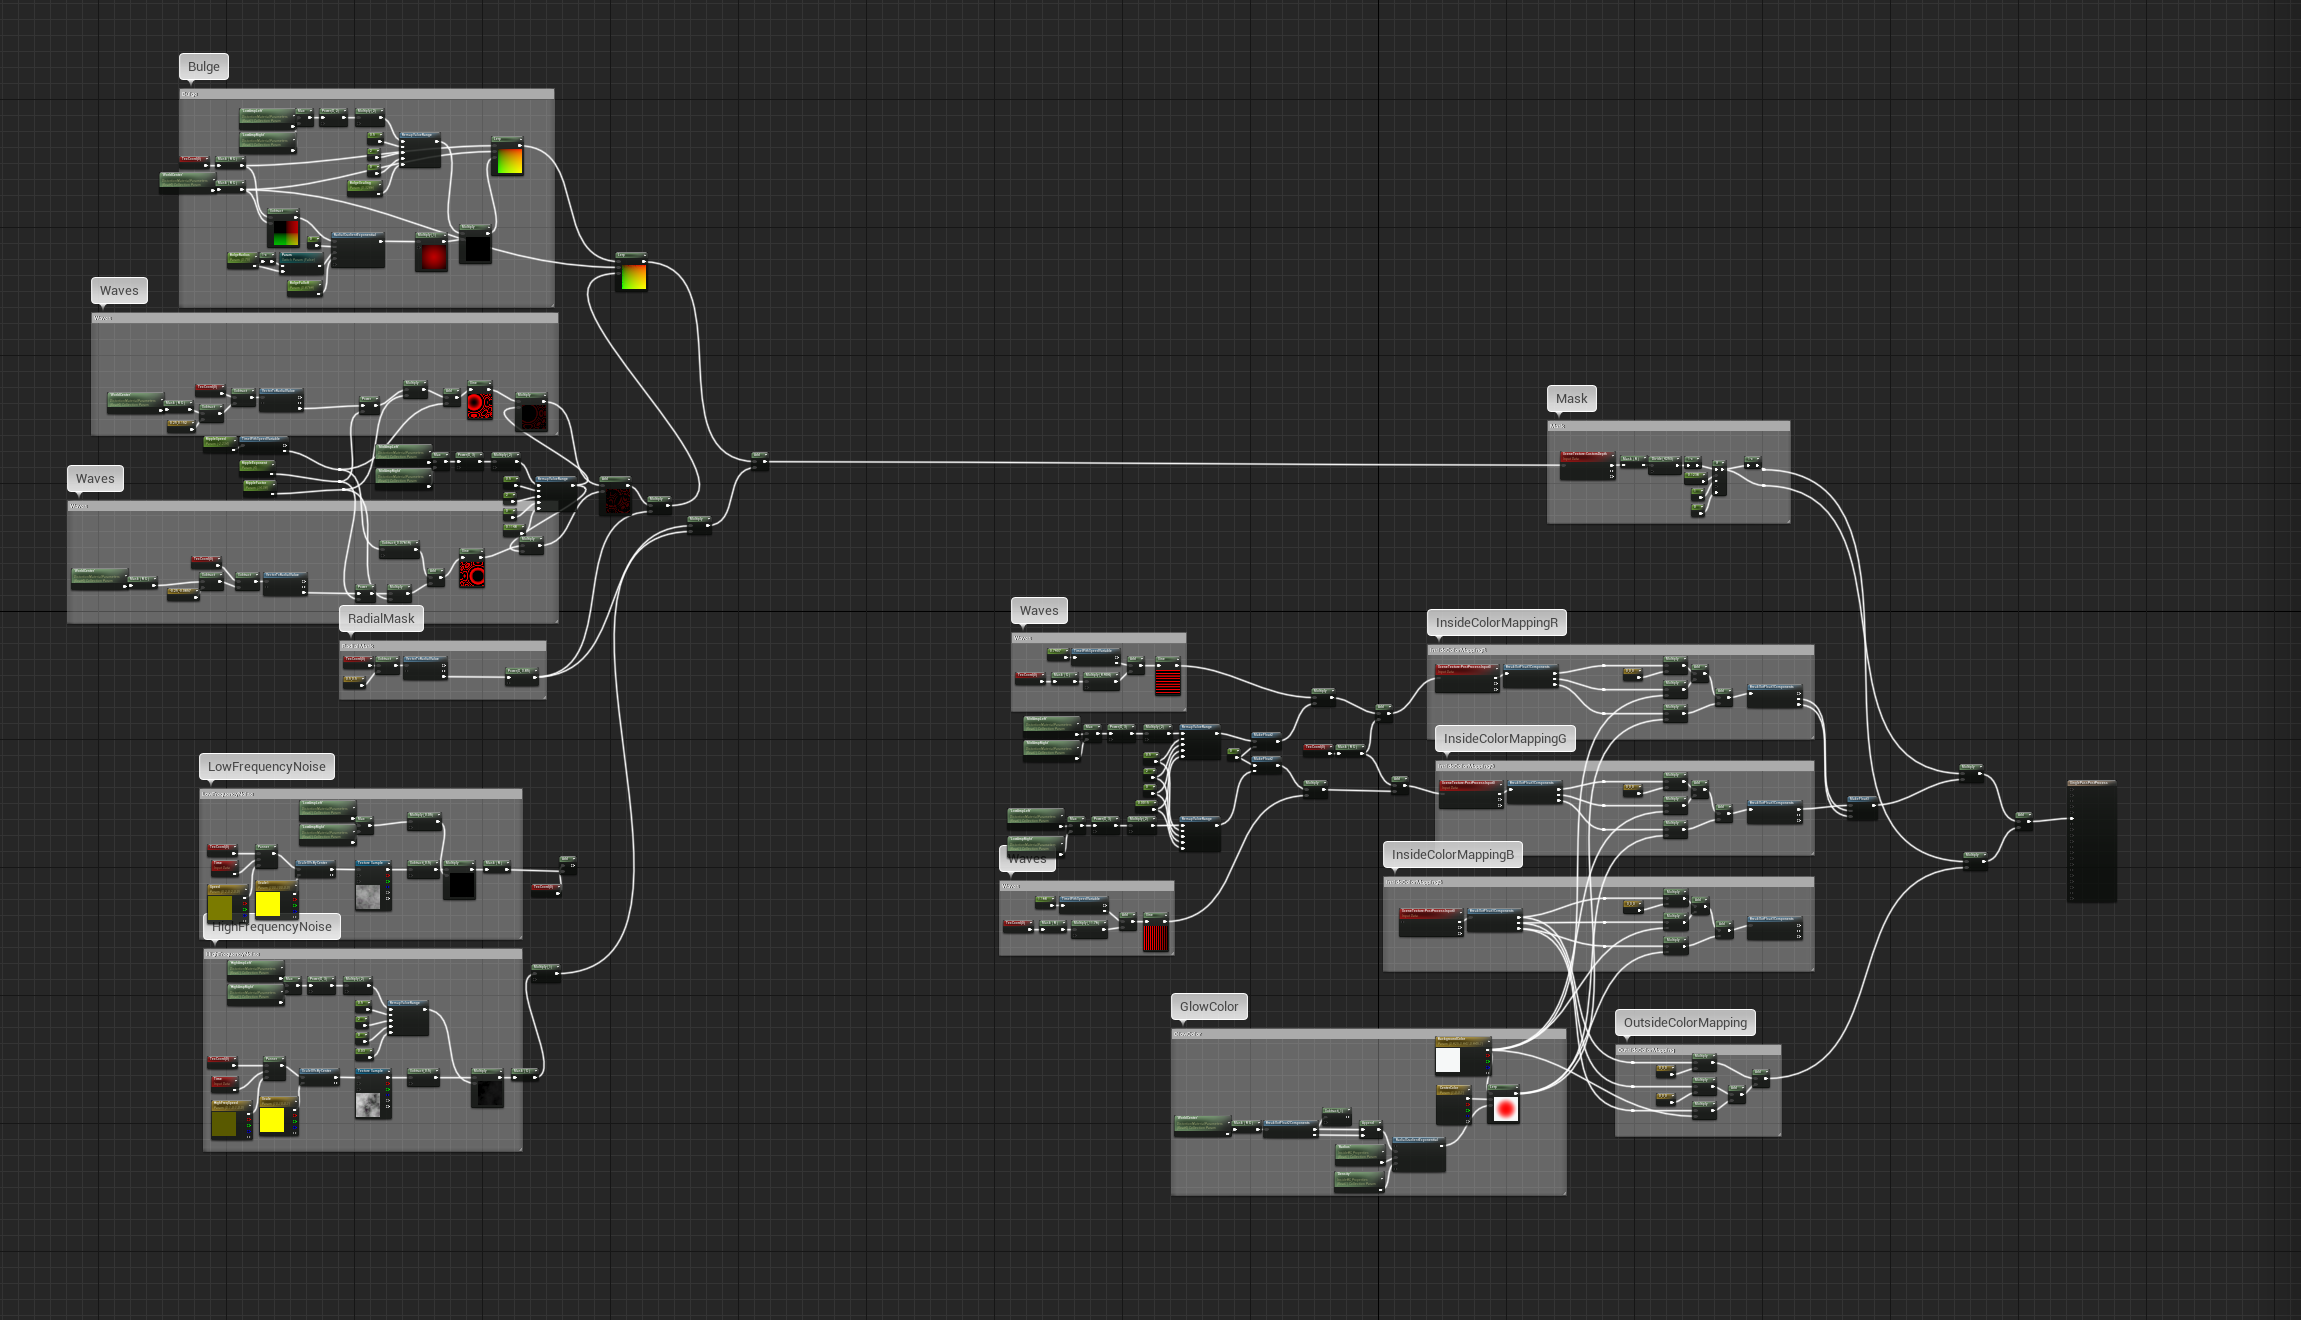
Using a combination of UV coordinate distortion techniques we can create the mask ripple effects and the color channel separation and adjust them in real-time. The full post process material is shown below.
Final Result
Now that all of the setup is complete, the intermediate render is done using the UE4 sequence render to movie option. This is an offline render meaning supersampling can be turned on to render 8K and then downsample to 4K in order to smooth the edges (the stencil buffer cannot be rendered with traditional antialiasing techniques leave the mask edges rough). The output video needs to be imported into After Effects for more processing, so lossless encoding is used resulting in a video file of around 100GBs and taking 8 hours to render.
Track titles (font is Acumin Pro Bold), credits, color correction and noise are added on top. The final video was exported from After Effects as a 4K .h264 video at 70mbps for archiving resulting in a 30gb video file and taking 24 hours to render.
The final audio track created in Ableton was overlaid on the final video using Logic Pro.